
Are razor bumps completely ruining your smooth skin? Figuring out how to prevent ingrown hairs after shaving is a struggle many face, but it does not have to be a permanent one. If you are dealing with painful, itchy red spots, you are in the right place.
I know exactly how frustrating it is to spend time grooming, only to be rewarded with irritated skin. As an editor who has tested countless routines, I can tell you that most conventional shaving advice actually makes the problem worse.
We are going to dive deep into everything you need to know. We will cover the biology behind the bumps, the exact step-by-step prevention routine, and the products that actually work.
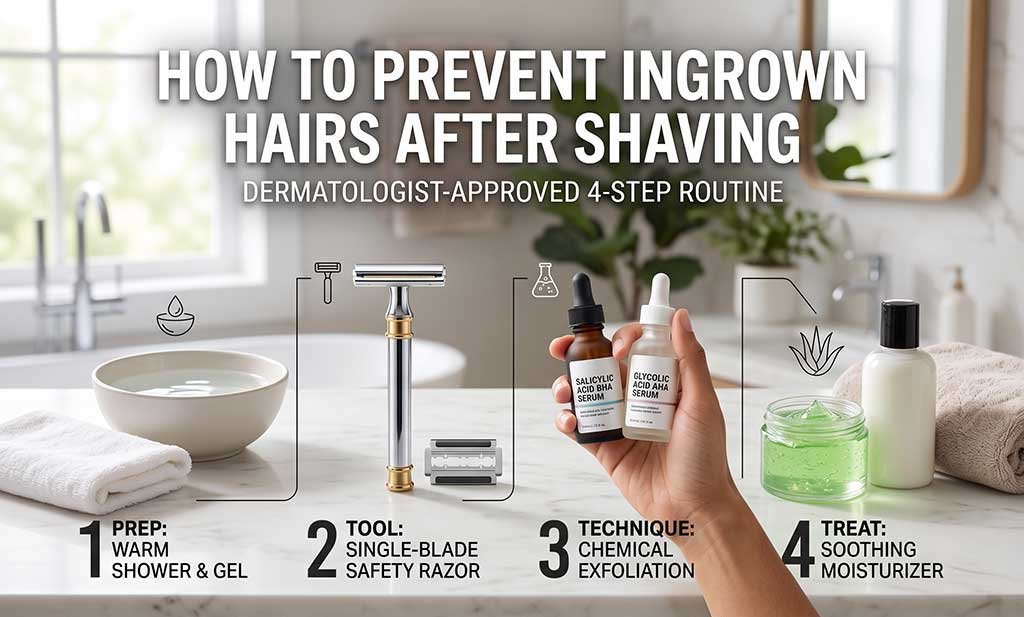
Table of Contents
What Are Ingrown Hairs?
Before we fix the problem, we need to understand exactly what we are dealing with. Ingrown hairs occur when a hair is cut short and then grows back into the skin instead of out of the follicle.
This trapped hair acts like a foreign object. Your body responds to it with an inflammatory response. That is why you get those swollen, red, and often painful bumps on your skin.
In the dermatology world, this condition is known as pseudofolliculitis barbae. It is especially common for individuals with curly or coarse hair. When curly hair is cut below the skin’s surface, it naturally curves back down.
This curling effect is the main villain in our story. But why does the hair get cut below the skin line in the first place? That usually comes down to improper technique and the wrong tools.
The 4-Step Routine on How to Prevent Ingrown Hairs After Shaving
Prevention is always better than a cure. If you want to stop getting razor bumps, you need a bulletproof routine. This four-step protocol is non-negotiable if you want flawlessly smooth skin.
1.Pre-Shave Preparation (The Crucial Step): Do not skip this phase.
Most people skip this step, and that is their biggest mistake. You should never shave dry skin or even mildly damp skin. You need heat and moisture to prep the hair. Take a warm shower for at least three to five minutes before you even pick up a razor.
The warm water softens the keratin in your hair. Soft hair requires much less force to cut, which prevents pulling. Next, apply a high-quality pre-shave oil or a thick, hydrating shaving gel. Avoid cheap foaming creams that dry out the skin. You need a protective, slick barrier between the blade and your delicate epidermis.
2.Choose the Right Tools: Safety Razor vs. Multi-Blade:
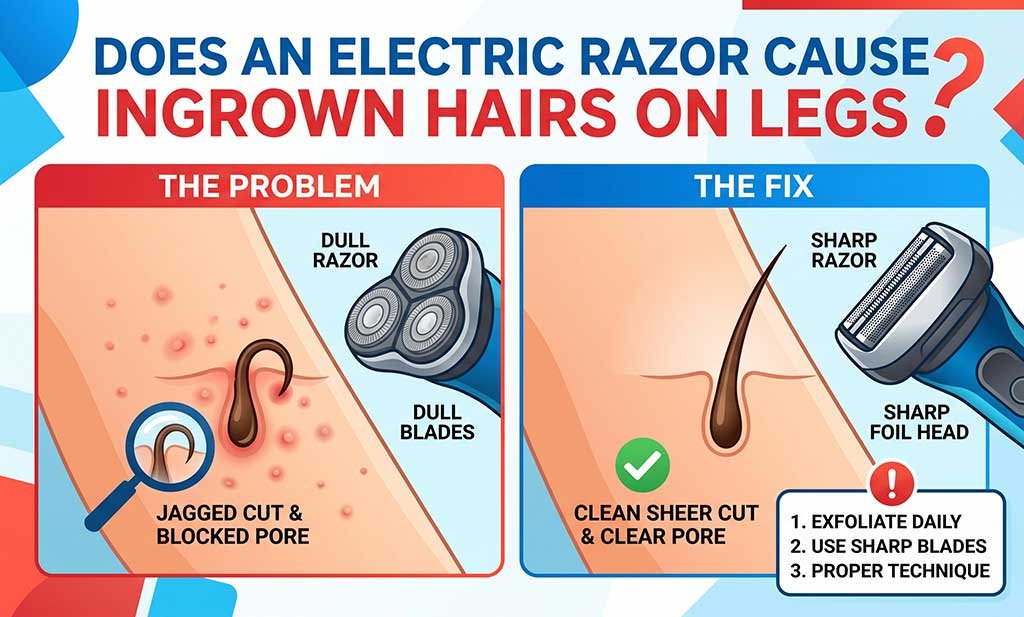
We have been conditioned to believe that more blades equal a better shave. This is a massive marketing myth. Multi-blade cartridge razors are actually the number one cause of razor bumps. Here is why: the first blade pulls the hair up, and the next blades slice it off. When the hair is released, it snaps back down below the skin line.
This “lift and cut” mechanism guarantees trapped hairs. Instead, switch to a single-blade safety razor. A safety razor cuts the hair cleanly at the surface of the skin without pulling it underneath. Alternatively, an electric trimmer leaves a microscopic fraction of stubble, preventing the issue entirely.
3.Master the Shaving Technique:
The golden rule of hair removal is simple: always be shaving with the grain. That means you must shave in the direction that your hair naturally grows. Shaving against the grain gives a closer shave, but it forcefully pulls the follicle and creates a sharp, angled tip on the hair. That sharp tip easily pierces the follicle wall and grows inward.
Use short, gentle strokes. Let the weight of the razor do the work; never press down hard. Rinse the blade under warm water between every single pass to remove clogged hair and shaving gel.
4.Post-Shave Care and Hydration: Cool down and treat.
Once you finish shaving, your skin is highly vulnerable. Your pores are open, and the top layer of dead skin has been scraped away. You need to cool down and treat the area immediately. Rinse your skin thoroughly with cold water.
This helps to quickly close the pores and reduce initial inflammation. Pat the skin dry with a clean, soft towel—never rub vigorously. Finish by applying a soothing, alcohol-free moisturizer or a dedicated post-shave care balm. Look for ingredients like aloe vera, witch hazel, or niacinamide. Avoid heavy, pore-clogging lotions right after shaving.
Chemical vs. Physical Exfoliation for Ingrown Hairs
Exfoliation is your best friend when fighting razor bumps. It removes the dead skin cells that block the hair follicle opening. However, not all exfoliation methods are created equal.
The Danger of Physical Scrubs
Physical exfoliation involves using abrasive substances like sugar, salt, or walnut shells. While they feel satisfying, they are often too harsh for freshly shaved skin.
Rubbing a gritty physical scrub over vulnerable skin causes micro-tears. These tiny scratches invite bacteria, leading to further inflammation and dark spots. I highly recommend avoiding harsh physical scrubs on delicate areas.
The Superiority of Chemical Exfoliation
This is where chemical exfoliation shines. Chemical exfoliants use mild acids to gently dissolve the glue that holds dead skin cells together. They work below the surface without any abrasive scrubbing.
Salicylic acid (a BHA) is the absolute gold standard here. Because it is oil-soluble, it can penetrate deep into the hair follicle to clear out excess sebum and dead cells. This clears the path for the hair to grow out properly.
Glycolic acid and lactic acid (AHAs) are also fantastic. They work on the surface of the skin to smooth texture and brighten dark spots left behind by old razor bumps. Using a liquid chemical exfoliant two to three times a week works wonders.
Tailoring Prevention to Different Body Parts
Not all skin is the same. The skin on your face is vastly different from the skin under your arms. Your prevention strategy must adapt to the specific area you are shaving.
Face and Neck
For the face and neck, understanding your beard hair mapping is critical. Facial hair grows in swirling patterns, especially on the neck. Map out the grain before you start.
Always use a pre-shave oil on the neck, as the skin here is incredibly thin and prone to irritation. A sharp single-blade razor is non-negotiable for facial hair.
Bikini Line and Pubic Area
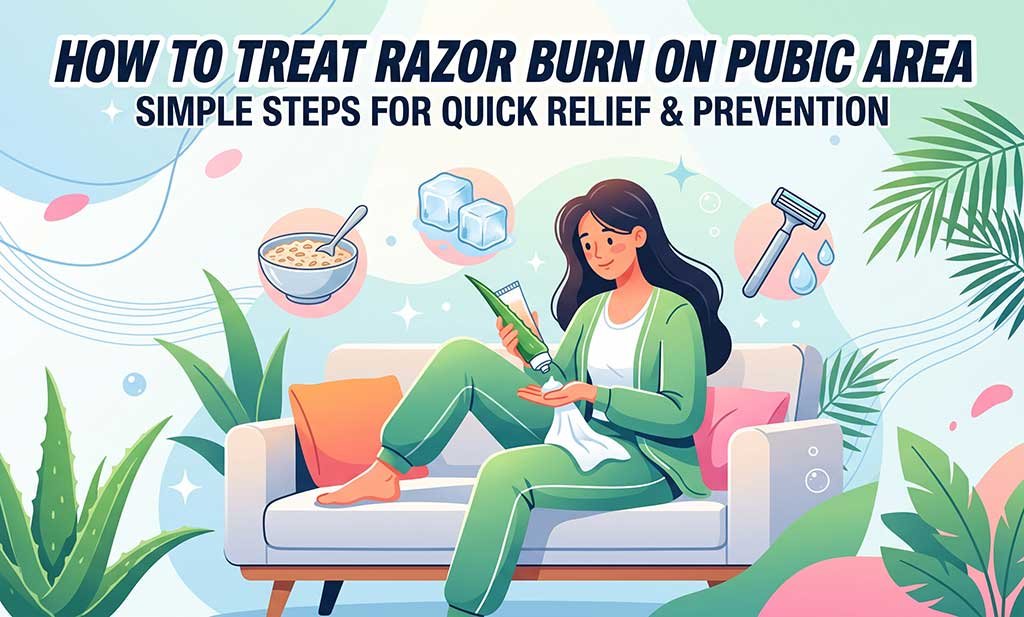
Preventing bikini line ingrown hairs requires special attention to friction. The skin here is sensitive, and the hair is naturally thicker and curlier.
After shaving the bikini area, avoid tight clothing and synthetic underwear. The elastic bands and tight fabrics create friction that forces growing hairs back into the skin. Wear loose cotton clothing for at least 24 hours post-shave.
Legs and Underarms
When shaving legs, the most common mistake is shaving over the same spot multiple times. This destroys the skin barrier and causes severe razor bumps. Make one clean pass and move on.
For underarms, remember that hair grows in a starburst pattern (up, down, and sideways). Apply shaving gel generously and shave gently in the required directions, avoiding heavy pressure. Deodorant applied immediately after can sting, so opt for a gentle formula.
Tool Hygiene: The Forgotten Step in Preventing Razor Bumps
You can have the perfect technique, but if your tools are dirty, you will get irritated skin. Bacteria thrives in warm, wet environments—like your bathroom.
When you shave, you can introduce bacteria directly into open hair follicles. This leads to bacterial folliculitis, which looks and feels exactly like severe razor bumps.
To clean your razor properly, rinse it thoroughly and then dip the head in rubbing alcohol. This instantly kills lingering bacteria and displaces water, preventing rust.
Never store your razor inside the shower. The constant humidity will dull the blades and turn the razor into a breeding ground for germs. Keep it in a dry, well-ventilated spot in your bathroom.
Finally, change your blades frequently. A dull blade tugs at the hair instead of cutting it cleanly. You should replace a disposable blade or a safety razor blade after three to five shaves.
When to Stop Shaving: Alternative Hair Removal Methods
Sometimes, a person’s skin is simply too sensitive, or their hair is too curly for traditional shaving. If you are doing everything right and still suffering, it might be time to ditch the razor.
Here is a quick breakdown of alternative hair removal methods and how they impact your skin.
Hair Removal Method | How it Works | Ingrown Hair Risk | Best Suited For |
Depilatory Creams | Dissolves hair protein just above the root | Low | Legs, arms, and the outer bikini line |
Electric Trimmers | Cuts hair slightly above skin level without dragging | Very Low | Face, neck, and highly sensitive skin |
Laser Hair Removal | Destroys the follicle completely using light (e.g., Nd:YAG) | None (Permanent) | All areas, especially for skin prone to dark spots |
Waxing / Epilating | Pulls hair out completely from the root | Moderate | Legs and underarms (exfoliation is vital here) |
If you are prone to deep pigmentation or scarring from ingrowns, investing in laser hair removal is life-changing. It destroys the root, meaning the hair can never curl back into the skin again.
If you want to understand the clinical mechanics of this, I highly recommend watching this comprehensive dermatologist breakdown on Doctor’s Secret to Never Getting an Ingrown Hair Again. It perfectly explains why your multi-blade razor is causing issues and why the Nd:YAG laser is the gold standard for deeper skin tones.
How to Treat Existing Razor Bumps Quickly
We have covered prevention, but what if you already have a painful cluster of bumps right now? You need immediate relief to reduce the swelling and prevent scarring.
First, apply a warm compress to the area for ten minutes. The heat increases blood flow and helps soften the trapped hair, encouraging it to release naturally.
Next, apply an over-the-counter 1% hydrocortisone cream. This is a mild steroid that will instantly kill the redness, itching, and swelling. Use it sparingly for no more than three days.
For spot treatments, dab a small amount of tea tree oil or a gentle benzoyl peroxide cream directly on the bump. These antibacterial agents dry out the inflammation and prevent infection.
A serious warning: Never use tweezers or needles to dig out a deeply embedded hair. I know it is tempting, but digging destroys the surrounding tissue, guarantees a bacterial infection, and leaves a permanent dark scar.
FAQ
Most mild cases will resolve on their own within a few days to a week if you leave them alone. Do not shave over the area while it is healing, or you will reset the clock.
Absolutely not. Popping forces bacteria deeper into the follicle and surrounding dermis. It turns a tiny annoyance into a massive, painful cyst that will leave a dark mark.
This usually happens because you are using a dull multi-blade razor, pressing too hard, or failing to chemically exfoliate dead skin cells. Switching to a safety razor and a BHA liquid usually fixes this.
Bottom Line
Achieving smooth, bump-free skin does not have to be a guessing game. By mastering these techniques, you now know exactly how to prevent ingrown hairs after shaving.
Remember to hydrate thoroughly beforehand, toss out those multi-blade cartridges for a single-blade option, and prioritize chemical exfoliation over harsh scrubbing. Your skin barrier will thank you.
Implement these steps into your routine today, and those painful razor bumps will become a thing of the past. Stay consistent, treat your skin gently, and enjoy the flawless results!

Leave a Reply